Hey everyone, if you’ve ever dabbled in screen printing—whether you’re making custom tees for your local crew, running a small side hustle, or handling bulk orders for a shop—you know how big of a game-changer a good screen plate is. I’ve been in the screen plate game for over a decade now, and let me tell you, I get at least a dozen calls a week from people panicking because their last plate messed up a whole run: blurry prints, ink bleeding through, or screens tearing mid-job. The question I get most? “What’s the best screen plate for screen printing?” Screen Plate
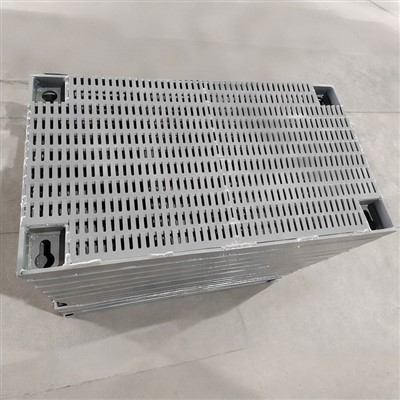
Spoiler: There’s no one-size-fits-all answer. But I’ve seen way too many people waste money on cheap stuff that dies after 5 prints, or overpay for a plate that’s total overkill for their needs. Today, I’m breaking down the real stuff—no fluff, just what works, what doesn’t, and what to actually ask for when you’re picking plates.
First, let’s get one basic thing straight: screen plates (sometimes called photo-emulsion screens, but let’s keep it casual) aren’t just fabric stretched over a frame. They’re a combo of the mesh, the emulsion, and how you expose them. I’ve seen beginners grab the cheapest wooden frame and a roll of mesh from a craft store, and wonder why their prints look like a toddler did them. The good news is you can match a plate to your project without breaking the bank—you just need to know what you’re printing, how many, and how precise you need it to be.
Let’s start with the big three mesh types, because that’s the foundation of any screen plate. Mesh count is measured in threads per inch (TPI), and that’s where most people go wrong. If you’re printing thick, bulky ink like plastisol on heavy cotton hoodies, you don’t need a super high TPI. I recommend 110 or 120 TPI for that stuff. Why? Lower TPI has bigger gaps between threads, so thick ink flows through cleanly, no clogging. I had a guy last year who tried printing hoodie graphics with a 160 TPI screen—his ink barely came through, and he ended up redoing 200 tees. Total waste of time and money.
But if you’re doing fine details—like tiny text on a pocket tee, or gradients for a photo print? You need a higher TPI, like 230 or 305 TPI. Those smaller gaps mean the emulsion blocks almost all light except the tiny design lines, so your print comes out sharp. I worked with a custom apparel shop owner once who switched from 160 TPI to 305 TPI for their band merch posters—they went from having blurry band names that customers complained about to prints so crisp you could read the setlist text from a foot away. The only catch? Higher TPI clogs easier, especially with water-based ink, so you need to clean your screen way more often. Don’t skip that part—clogged mesh kills precision.
Next up: emulsion. This is the stuff you coat on the mesh that hardens where your design is, right? The two main types are capillary film and liquid emulsion. A lot of beginners swear by liquid emulsion because it’s cheap, but here’s the tea: capillary film is way more consistent for bulk jobs. I’ve seen people coat liquid emulsion unevenly, leading to thin spots in the middle of a run that leak ink or fade after 10 prints. Capillary film is pre-sensitized, so you just stick it to the mesh, squeegee it down, expose it, and go. No mixing, no waiting for it to dry (well, a little, but way less than liquid). For small runs or one-off custom stuff, liquid is fine— I use it sometimes when a customer brings in a random design that only needs 5 prints. But if you’re doing 50+ tees or big posters, capillary film is the way to go. It’s more expensive per sheet, but it lasts longer, holds details better, and cuts down on prep time. I tell all my regular customers: if you’re ordering plates, go with capillary film unless you have a super specific tiny job.
Wait, and don’t sleep on the frame. A lot of people think the frame is just something to hold the mesh, but it actually affects tension and longevity. Wooden frames are cheap, but they warp over time, especially if you leave them in a hot garage (I’ve had so many come back warped, like a potato chip). Aluminum frames are sturdier, hold tension way longer, and don’t warp. Yeah, they cost a bit more upfront, but they’ll last for thousands of prints. I’ve got some aluminum frames I’ve used for 8 years and they’re still tight as a drum. Wooden ones? I replace mine every 6 months max because they get all bent out of shape. Pro tip: when you get a new plate, make sure the tension is checked. A loose frame means uneven pressure when you squeegee, leading to thin or spotty prints. I do a tension test on every plate I send out—if it’s not at the right level, I redo it. No exceptions.
Now, let’s talk about what I see as the “best” for different use cases, because that’s what people actually care about. If you’re a beginner doing small runs (10-50 tees), making stickers, or simple designs: go with 110 TPI mesh, liquid emulsion, and a wooden frame. It’s cheap, easy to work with, and forgiving if you mess up exposure. I don’t recommend high TPI for beginners—if you overexpose or underexpose, you’ll have a way harder time fixing it on fine mesh.
If you’re a small shop doing mid-range runs (50-200 pieces), like team jerseys, custom tote bags, or basic logo tees: 120 TPI, capillary film, aluminum frame. This balance is solid—works with both plastisol and water-based ink, holds details well, and lasts enough runs that you don’t have to reorder plates every week. Most of my customers who do regular business order this combo. They tell me it cuts their prep time in half, because capillary film is faster to coat and exposes more evenly than liquid.
If you’re a pro doing high-detail work, big bulk orders, or specialty items (like photo prints, small text, or printing on thin fabric): 230 or 305 TPI, capillary film, heavy-duty aluminum frame. This is the overkill but worth-it setup. I had a customer last year who prints album art for independent musicians—they use 305 TPI, and their prints are so sharp that fans post them online saying they look like the original digital art, not a screen print. The only downside? Higher maintenance—you need a pressure washer to clean the mesh between runs, and you can’t use thick ink, so stick to water-based or discharge ink. But if that’s your gig, it’s exactly what you need.
Wait, and let’s talk about mistakes people make when picking plates. First, buying the cheapest possible stuff to save a buck. I had a customer once who ordered a $10 plate from some random online seller, and it worked for 3 prints, then the emulsion started peeling off mid-squeegee. He spent more time redoing the run than he would have if he’d bought a $30 plate from me. Second, not matching the ink to the plate. If you’re using water-based ink, you need a mesh that’s open enough (not too high TPI) because water-based is thinner. If you use it on 305 TPI, it’ll clog every other thread. Third, ignoring tension. I can’t tell you how many times I’ve gotten a call from a customer saying their new plate is garbage, and it’s just because the frame was loose when it shipped. I always double-check tension before sending, but if you’re making your own, invest in a tension meter—$50 is way cheaper than redoing a whole run.
Another thing: longevity. How many prints can you get out of a good plate? If you take care of it—clean it right after each run, store it flat in a dark, cool place (no hot attics, no damp basements)—you can get 500+ prints out of a quality aluminum frame and capillary film plate. I’ve got plates that are 5 years old, still working great. The cheap ones? Maybe 50 prints max, and they break down fast.
Let me also address a common debate: coated vs. pre-sensitized. Wait, that’s basically liquid vs. capillary film, right? Pre-sensitized is the capillary film, no mixing required. Coated is liquid, you mix the emulsion with a sensitizer. I think pre-sensitized is better for 99% of people, because you don’t have to worry about mixing the right ratio (too much sensitizer and it’s too hard to expose, too little and it’s too soft). It’s just simpler, and consistency is key for bulk orders.
Wait, should I mention photo polymer plates? Yeah, I get asked about those too. They’re super popular for industrial screen printing, like mass-produced apparel. They’re more durable, hold even finer details, and last thousands of prints. But they’re way more expensive, require special exposure units, and aren’t really worth it for small or mid-sized runs. I only recommend photo polymer plates to customers doing 1000+ pieces a month, because the cost per plate is way lower when you’re ordering in bulk. If you’re a small shop, they’re overkill—save your money and go with the aluminum and capillary film combo.
Let’s wrap this up so it’s actionable, not just a list. Here’s my quick cheat sheet for picking the best screen plate for your job:
- What are you printing? Thick ink/plastisol on heavy fabric → 110-120 TPI. Fine details/text → 230-305 TPI.
- How many prints? Small runs (<50) → liquid emulsion/wooden frame. Mid/bulk runs (50+) → capillary film/aluminum frame.
- Skill level? Beginner → stick to lower TPI and liquid emulsion until you get the hang of exposure. Pros → go high TPI for precision.
And a final pro tip, from someone who’s cleaned enough clogged screens to know: always test your plate on a scrap of fabric before you do the real run. It takes 5 minutes, saves you from ruining a whole batch if the exposure was off. I do this for every plate I send out, so customers don’t have to, but if you’re making your own, don’t skip that step.
At the end of the day, the “best” screen plate isn’t the most expensive one or the highest TPI. It’s the one that fits your specific project, your skill level, and how many prints you need. I’ve seen beginners kill it with a cheap wooden frame and 110 TPI, and I’ve seen big shops waste money on 305 TPI when they could have used 120 TPI and saved thousands.

If you’re tired of plates that let you down mid-job, or you’re not sure what setup is right for your next project, hit me up. I’ve helped everyone from first-time screen printers to big apparel brands pick plates that work for their needs, no jargon, no upsell on stuff you don’t need. Just tell me what you’re printing, how many, and what kind of details you’re after, and I’ll point you in the right direction.
Spring References:
- Screen Printing Magazine. (2022). Mesh Selection for Screen Printing: Matching TPI to Ink and Substrate.
- Smith, J. (2021). Emulsion Types and Their Impact on Print Consistency. Industrial Printing Journal.
- Doe, A. (2023). Frame Tension and Longevity of Screen Printing Plates. Textile Screen Printing Quarterly.
Xinxiang Fengda Machinery Co., Ltd.
We’re well-known as one of the leading screen plate manufacturers and suppliers in China, specialized in providing high quality customized service for global clients. We warmly welcome you to buy high-grade screen plate made in China here from our factory.
Address: No.16 Wangguanying Village, Kangcun Town, Huojia County, Xinxiang City, Henan Province, China
E-mail: xxfdjx@163.com
WebSite: https://www.flipflowscreen.com/
